

how to turn supermarket flowers into a designer Bouquet
This such a cool, budget friendly life hack! Supermarkets these days have really pretty blooms. I am going to teach you how you can turn them into something that looks like it costs over $100. This is perfect for when you want to gift flowers and with Mother’s day coming up. 🌸

I recently went to my local supermarket and i was so impressed with all of the pretty flowers that they had for sale. The best part about them was they were so reasonably priced and, they had bunches of different flowers that looked so pretty together.
Flowers, although they don’t last very long, can be so expensive to buy when you go to a fancy florist. Supporting local is important, but when you are short of time and are on a budget this DIY bouquet idea is the perfect hack.
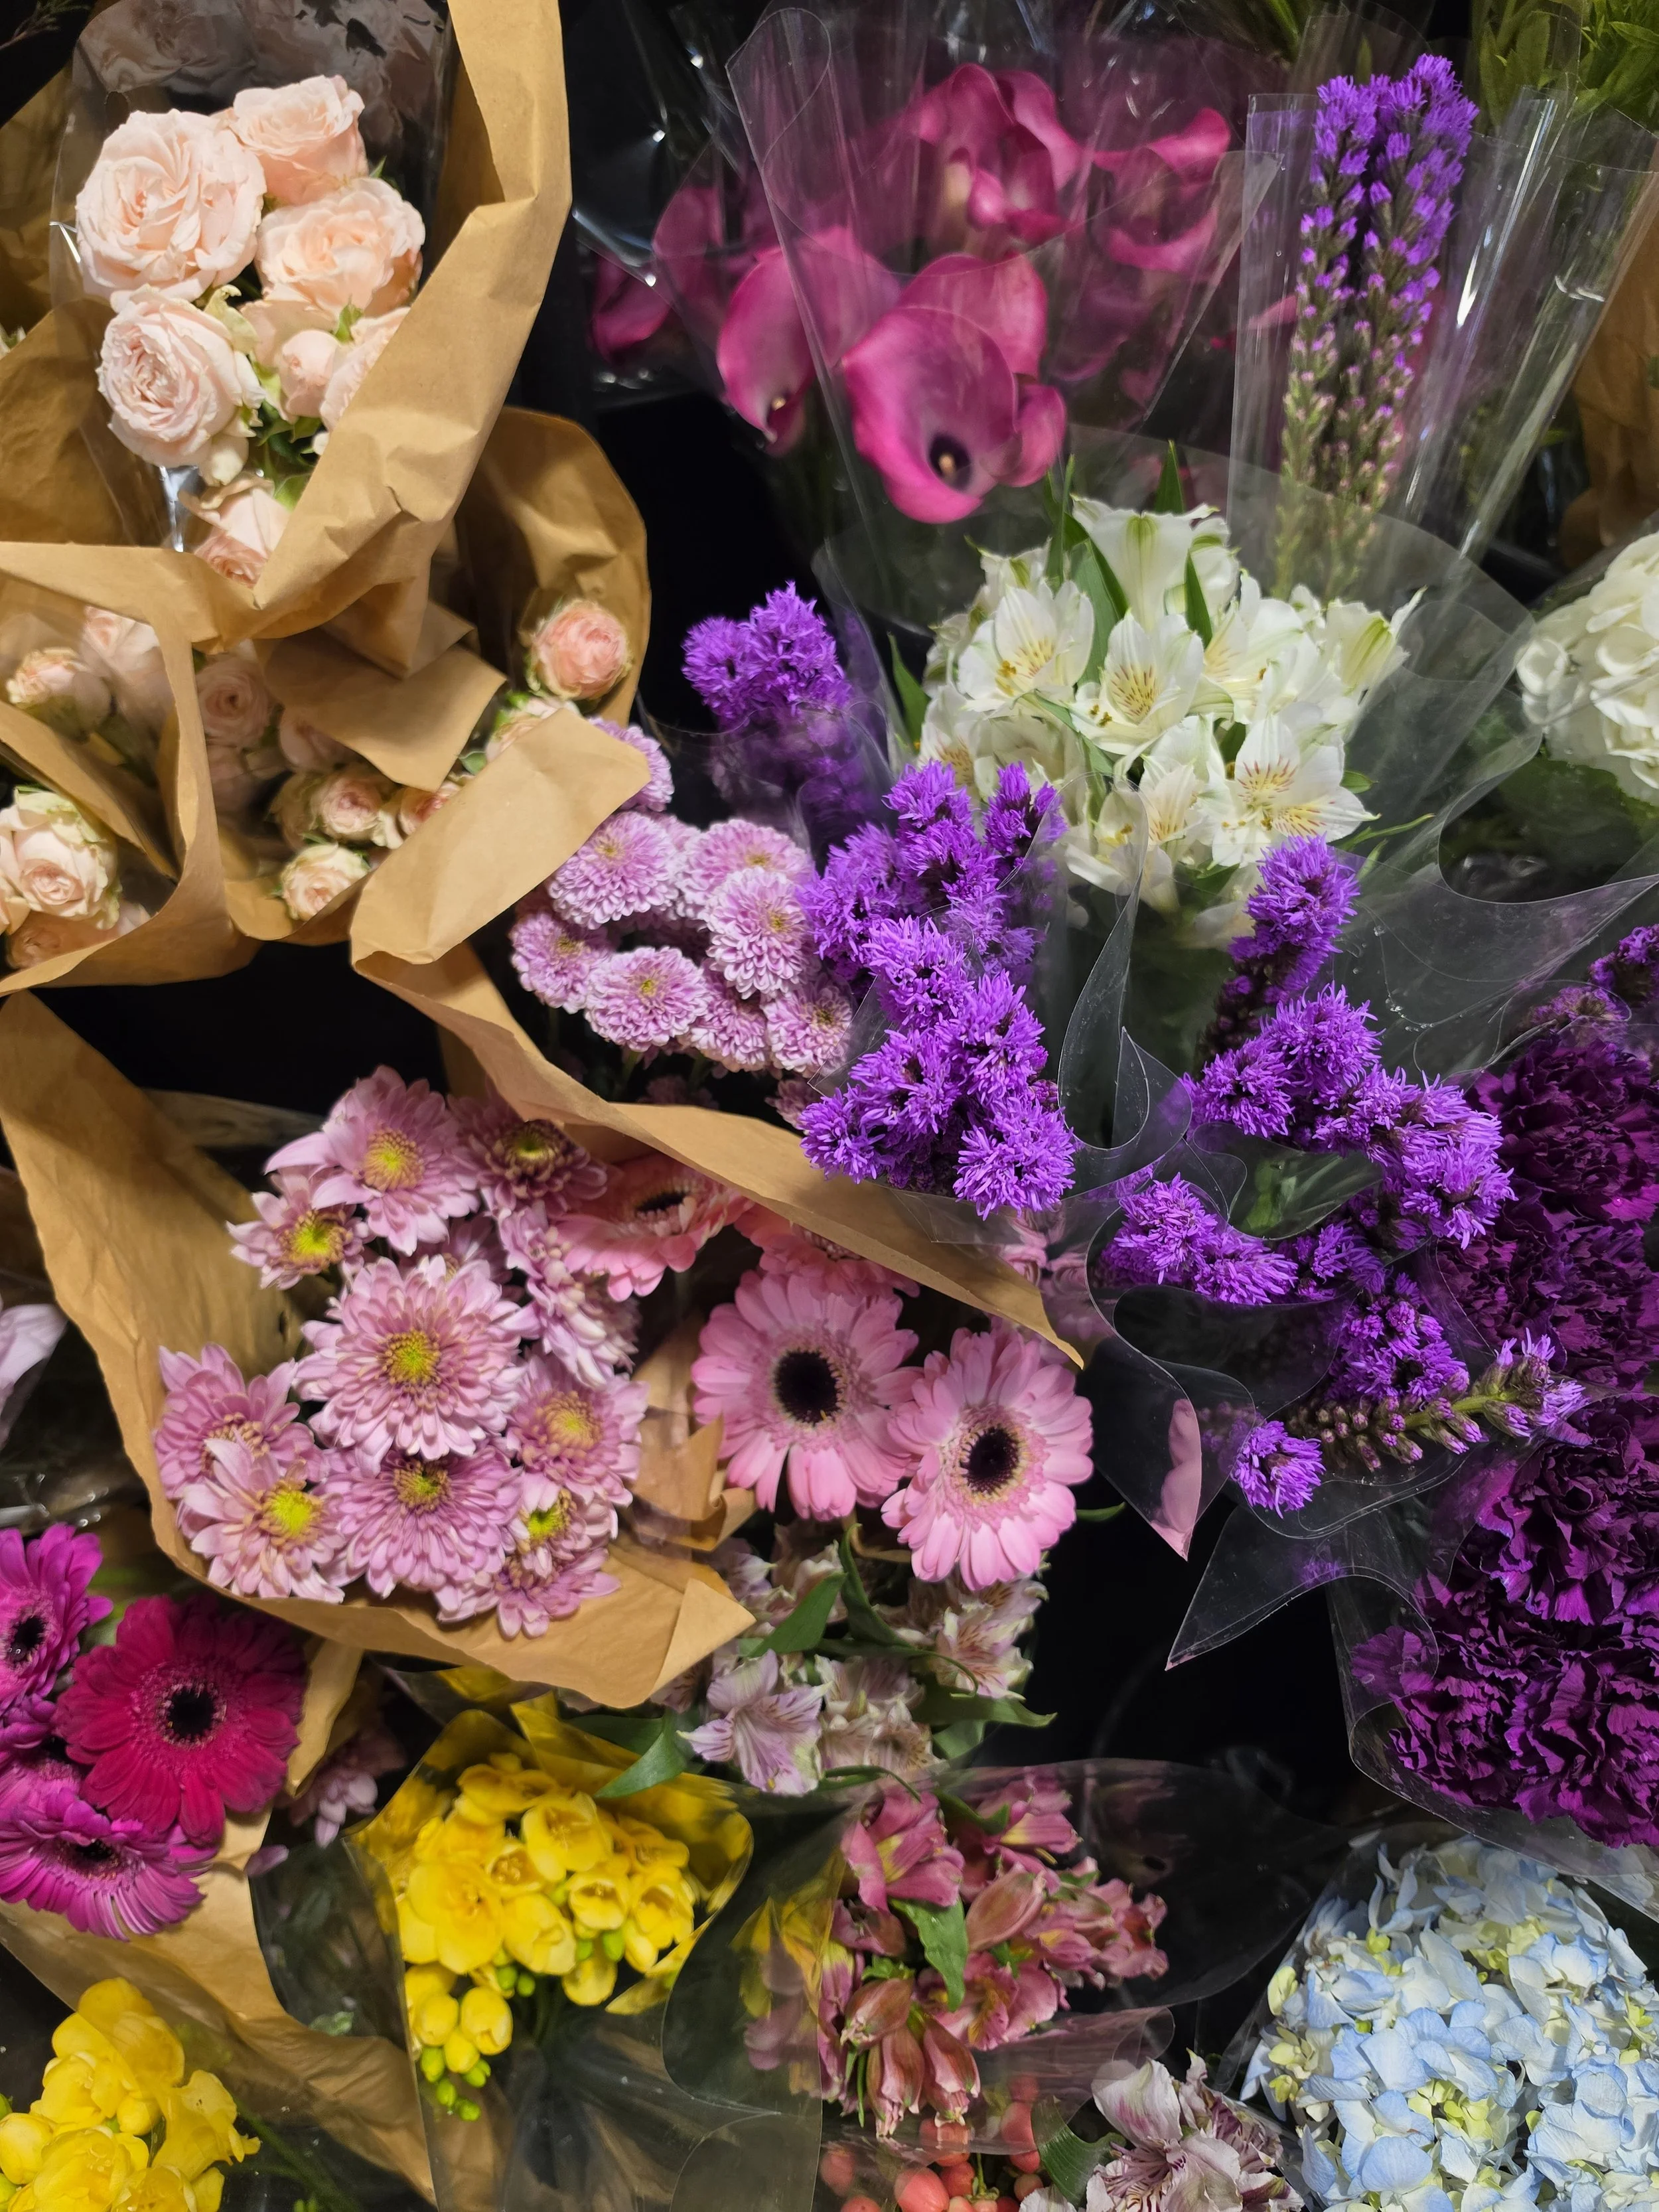
Just a few of the pretty blooms i saw the other day!
Supermarket bouquets don’t always give that designer, put together look. Let’s be real, they just look like you ran to the grocery store last minute and didn’t put any effort into anything at all.
But, with a few simple tweaks, you can turn even the most basic grocery store bought blooms, into a bouquet that looks like you ordered it weeks ago from a high end flower shop.
Let’s get into how.
Step one: Choose your flowers intentionally
The secret to a designer looking bouquet starts with the flowers you choose. Put some thought into color, size, and theme.
Try this simple formula:
Choose one main focal flower (like roses, peonies, or zinnia’s)
Add one or two supporting flowers (choose colors that go with the focal flower)
Choose greenery (like eucalyptus or ruscus)
These will create your base and you can even just buy some premade bouquets to rearrange if you don’t feel like getting to creative.
Step two: Take everything apart
Don’t skip this step. This is how you get that designer look.
When you get home:
Remove all plastic wrapping and bands
Separate every stem
Strip off any leaves that are below the water line - pro tip!
Step three: Choose a vase
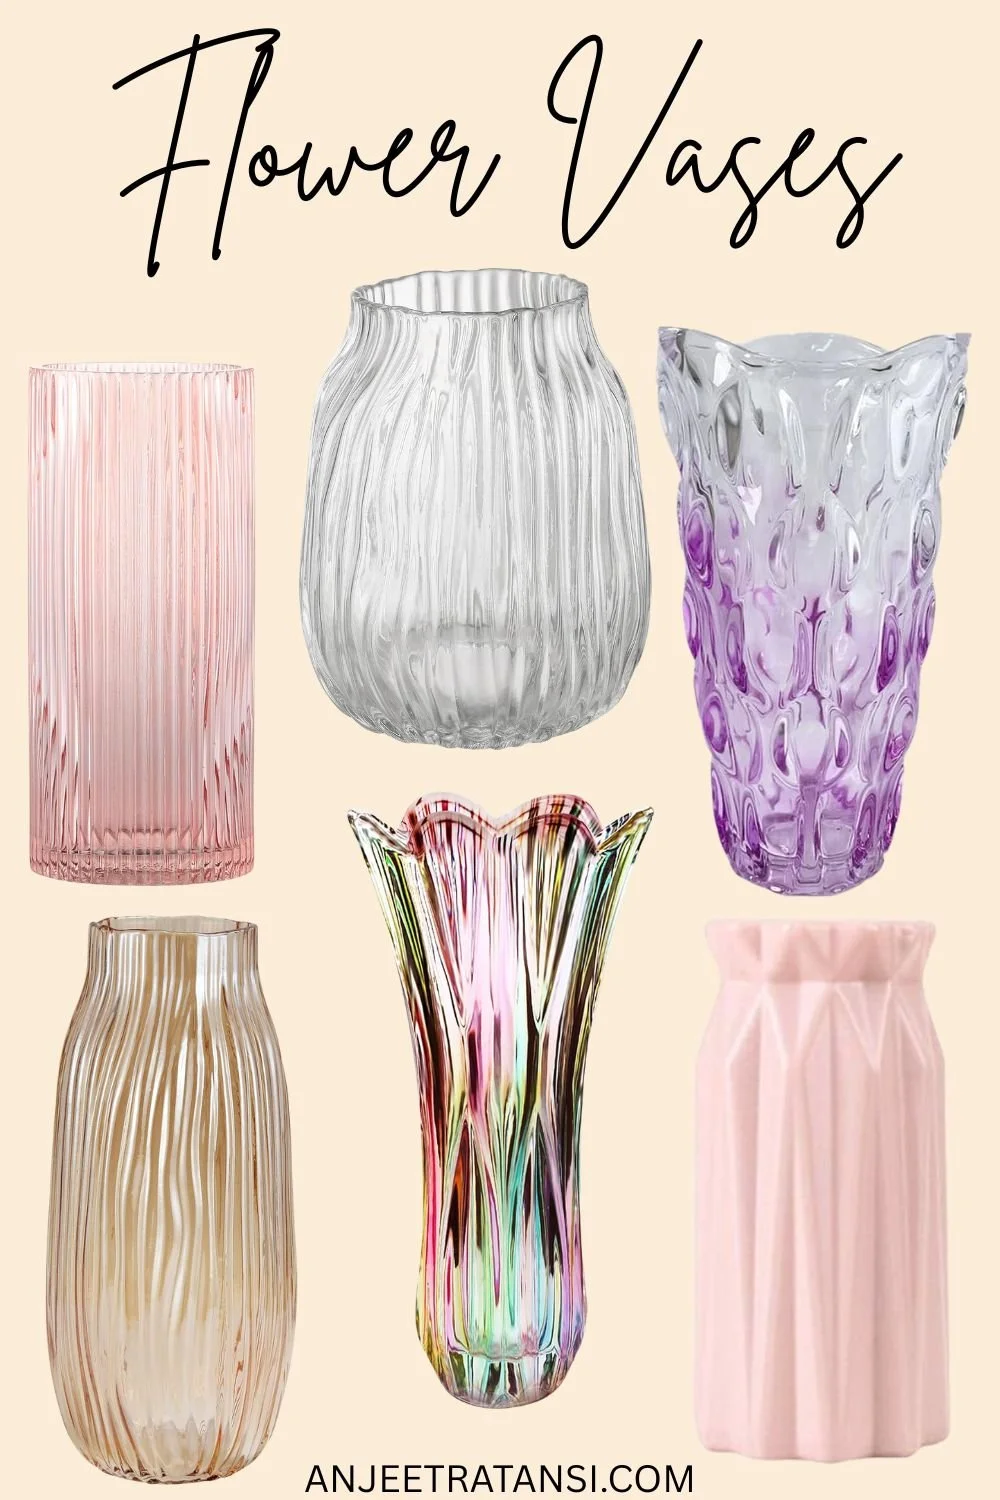
Every expensive looking bouquet starts with a pretty vase.
The good news is they can easily be picked up at a local dollar store, Amazon, or even Ikea, if you have time. Choose a vase that is made of ceramic and matches the color them of your bouquet to make sure it all fits together.
You can even use a mason jar for that rustic look.
Step four: Build a loose, airy base
You may notice that expensive bouquets are never tightly packed or overly structured.
Always start by placing your greenery in the vase first. This creates a soft, natural base.
Then you can begin adding your flowers slowly:
Place some stems slightly higher
Let others fall a bit lower
Allow a few pieces to gently lean outward
The goal should be effortless and slightly undone.
Step five: Add your focal flowers
Now is the time to add your main blooms.
Place your focal flowers one at a time. Space them out instead of clustering them together. Rotate your vase as you add so that you know how your creation looks from every angle.
Step six: Edit and refine
This is is what will truly make your bouquet look like it was professionally arranged.
Once you have everything in place:
Take a step back and look at the overall shape
Adjust any stems that look out of place
Trim a few pieces to create balance
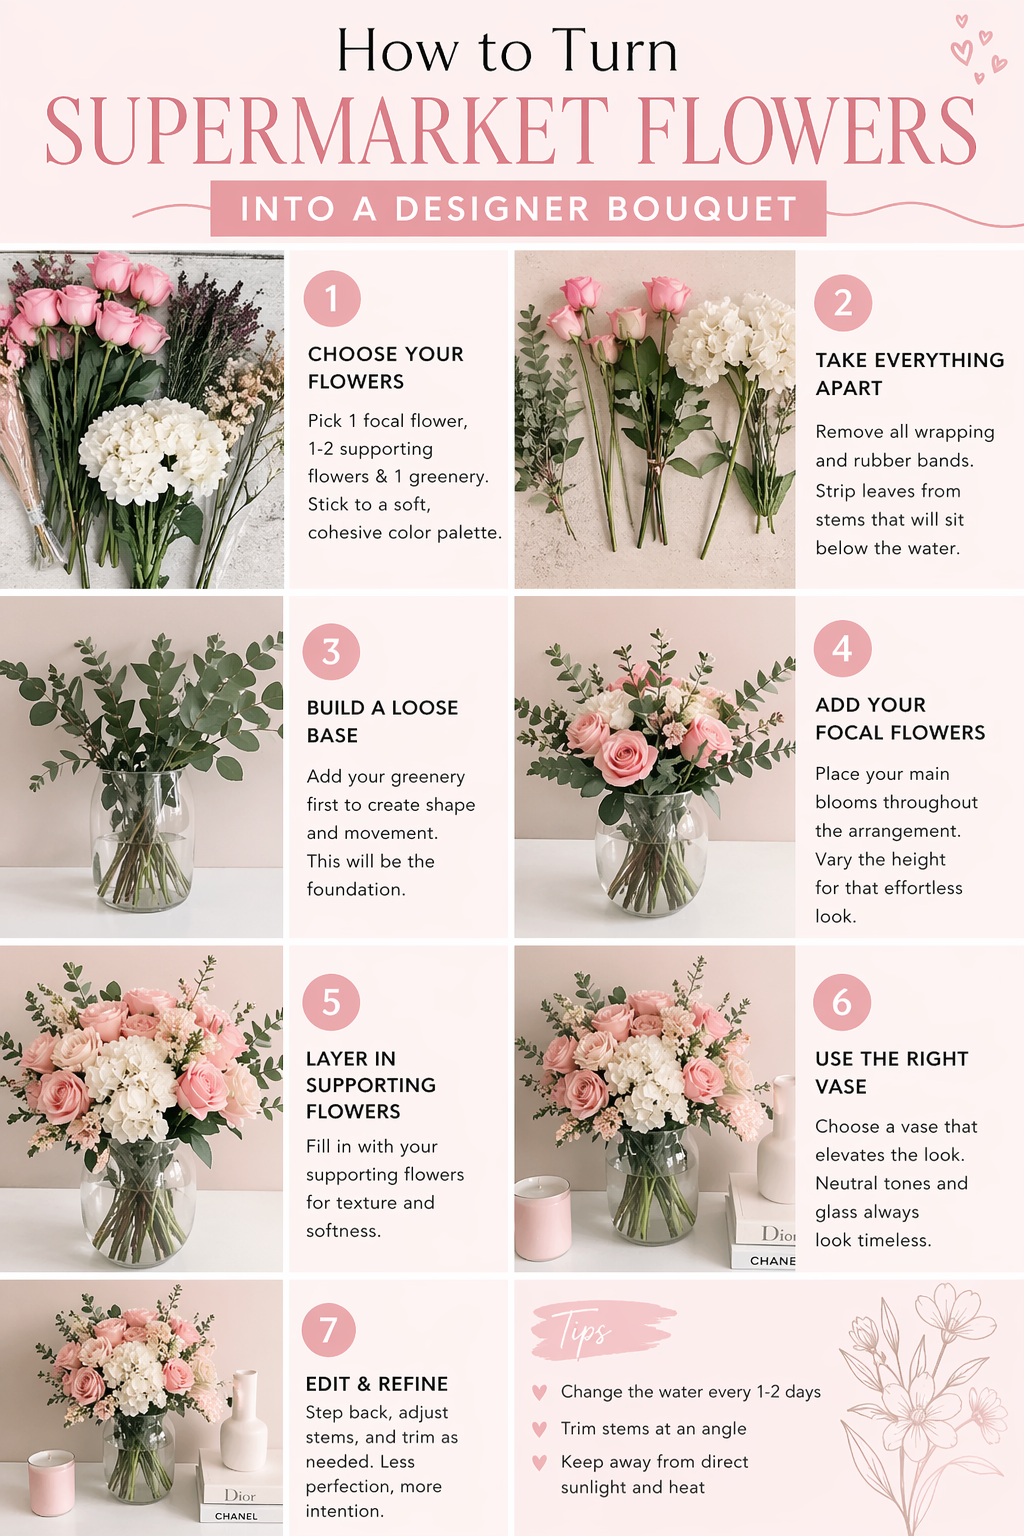
Tips to make you bouquet last longer
To keep flowers looking fresh and beautiful:
Change the water every other day
Trim the stems at an angle when you notice the water changing color
Keep your bouquet out of direct sunlight and heat
With a little care your bouquet can look pretty for weeks! If you are interested in growing your own cut flowers, you can read my guide here.
Disclaimer: When you purchase using my links on Amazon, i do make a commission at no extra cost to you. Thank you!